How to setup a ResearchKit project
So you want to make a medical study app?
ResearchKit is a great framework to help you build an engaging mobile experience, but it’s also fairly complex, especially if you are new to iOS development. This step-by-step guide will help you setup your first ResearchKit project.
Note that this article is not about building the app itself, as it focuses on getting the tools you need, and how to configure them.
#1 — Install Xcode
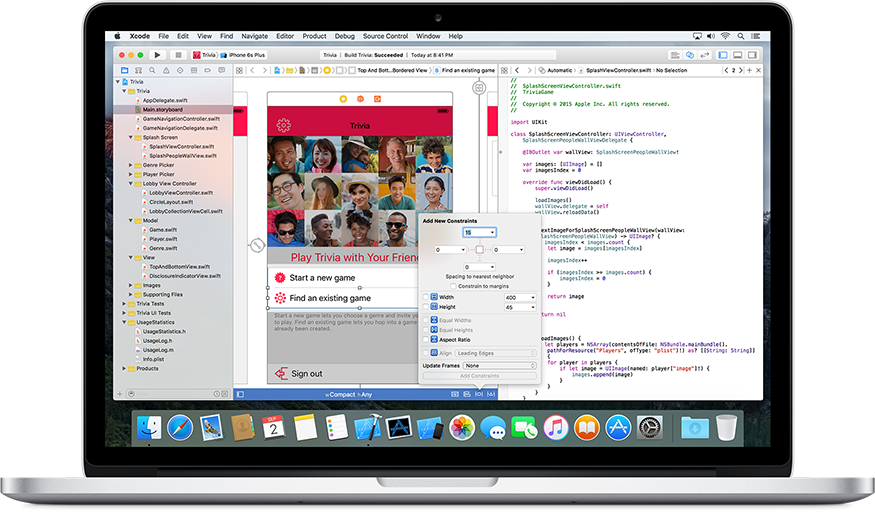
You only need one application to make iOS apps. Xcode is the official IDE (integrated development environment) for all Apple platforms: Mac, iPhone, iPod touch, iPad, Apple TV, and Apple Watch.
“Xcode provides developers a unified workflow for user interface design, coding, testing, and debugging.”
Mac App Store description
 “What’s new in Xcode”, image Apple
It’s only available for OS X, so you will need a Mac computer to build your ResearchKit app. You won’t necessarily need an iPhone to test your project, though, because Xcode provides an iPhone Simulator that runs directly on your computer.
The easiest way to install Xcode is to download it from the Mac App Store. This is a massive piece of software (more than 4 GB), so this operation might take a while. Alternatively, you can download the installer, as well as beta versions for upcoming releases, directly from the Apple developer website.
Xcode gets updated several times a year, and it’s generally best to keep up with the latest version. For instance, ResearchKit currently requires Xcode 7.0 or newer. One of the advantages of installing it from the Mac App Store is that you will get “delta” updates: instead of having to download the entire installer for every new version, the system will be able to download only the parts that have changed. So it’s usually a better choice in the long run.
You can find out more about Xcode with the online documentation.
Some people can be put off by the Xcode interface, and might prefer using a different code editor for instance. Xcode certainly is a complex application, and it takes time to get used to it. Even if it seems overwhelming at first, it’s generally easier to stick to the recommended approach, and only use Xcode to create iOS apps.
#2 — Create app project
An app is structured by a “Xcode project”, which will organize all the necessary files: configuration, source code, assets, libraries, etc.
Instead of starting from a blank page, Xcode offers different project templates, based on the type of app you want to make. Unfortunately, there’s no ResearchKit template (yet?), but we can just select a generic template, then import ResearchKit later.
To create a new project, open Xcode, then click on “File” → “New” → “Project…”. A window will appear to let you choose one of the existing templates.
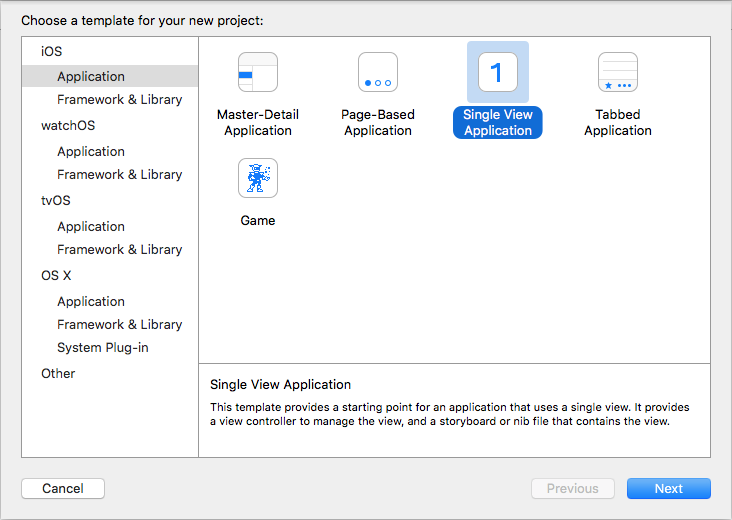
To keep things simple, we will select the “Single View Application” (in “iOS” → “Application”). Then, you need to set a couple of parameters, beginning with your project’s name.
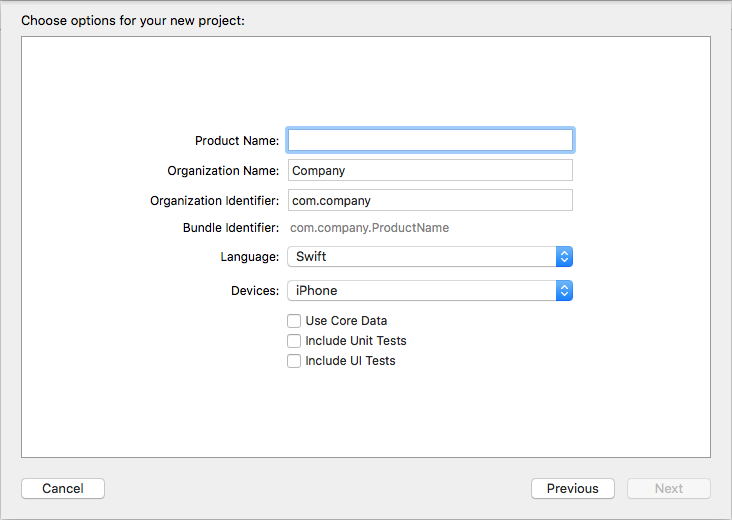
By default, the name for the project also becomes the name for your app (hence Product Name). But don’t worry, you can rename your app later. On the other hand, the project name is more permanent, because Xcode will use it to create folders and configuration files. It is possible to change that later, but it becomes more complicated because of all the moving parts involved.
So it’s best to take a moment and think about a good project name. As an example, the original ResearchKit apps used distinct app and project names (“GlucoSuccess” is actually “Diabetes.xcodeproj”, “MyHeartCounts” is actually “CardioHealth.xcodeproj”, and so on).
The Organization Name is mainly used for self-documentation purposes, and can easily be changed later. This could be the name of your research group, laboratory, or university.
The Organization Identifier, combined with the “Product Name” as the “Bundle Identifier”, is used to make sure that every app is uniquely identifiable (for instance, you can have two apps with the same name on your iPhone, but you can’t have two separate apps with the same identifier). We generally use the “reversed URL” convention. That would be the internet domain (the root of the website address) for your research group for instance, but in reversed. It has two main advantages: a website can only be owned by one entity, so it guarantees (in theory) that only you will use this identifier; and being reversed makes a list of identifiers more practical when sorted alphabetically (apps appear grouped by organization).
Next, the Language. You only have two choices for your code: Objective-C or Swift. They are largely interoperable, so you will actually be able to mix them if you want, but more importantly, it means that you can develop your app with Swift while ResearchKit is actually written in Objective-C. So, which one should you choose? That’s a complex question, but if you’re only starting iOS development, and unless you’re already familiar with Objective-C, we would recommend Swift.
With Devices, you can choose to limit the app only to the iPhone (and iPod touch), or to the iPad, or make it “universal”. ResearchKit works best on the iPhone, so we’ll go with that. It’s also very easy to change this option later.
We will leave the remaining settings unchecked. “Core Data” is an advanced framework for object representation and data persistence. “Unit Tests” are pieces of software that can help you make sure an app is always working as expected. It can be very useful, especially for bigger projects, but you don’t need them to make an app. The “UI Tests”, as you can guess, are like extended Unit Tests, capable of checking the behavior of an app from the perspective of its user interface.
After clicking on “Next”, all you need is to choose a location for your project on your computer. For now, you can also ignore the “Source Control” option at the bottom of the dialog. Click on “Create”, and your project is here.
#3 — Download ResearchKit
ResearchKit is a project run by Apple, but it’s not included in the iOS system libraries, so you need to download it separately.
The project is hosted on GitHub. This popular web service makes it easy for people to share source code, and —more importantly— to collaborate with other people. That means proposing code changes, discussing options, reporting bugs, etc.
In our case, we simply need to download the ResearchKit source code. That’s very easy, you can just click on the “Download ZIP” button.
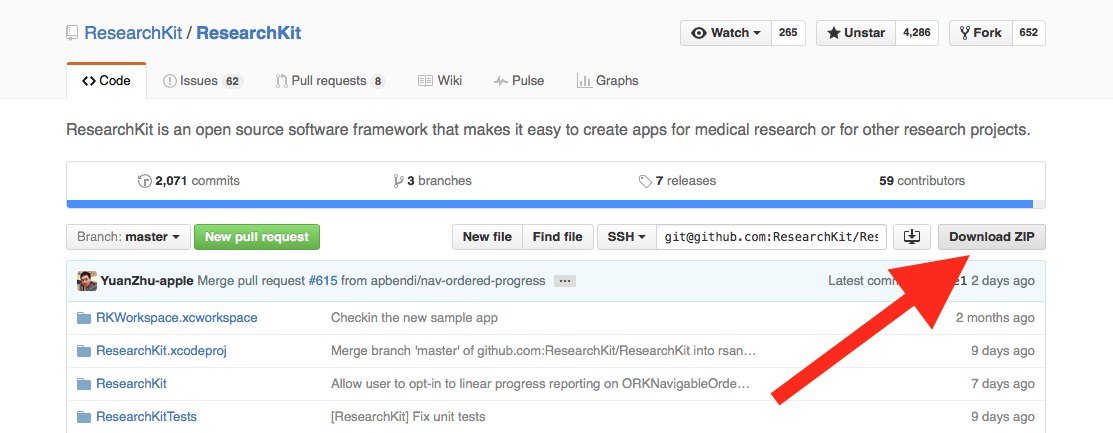
This archive contains all you need to include ResearchKit into your Xcode project.
#4 — Configure ResearchKit
The next step is to configure our app project to include ResearchKit as a “framework”. It means that every time Xcode needs to build the app, it should first prepare ResearchKit, import the source code, and include its assets.
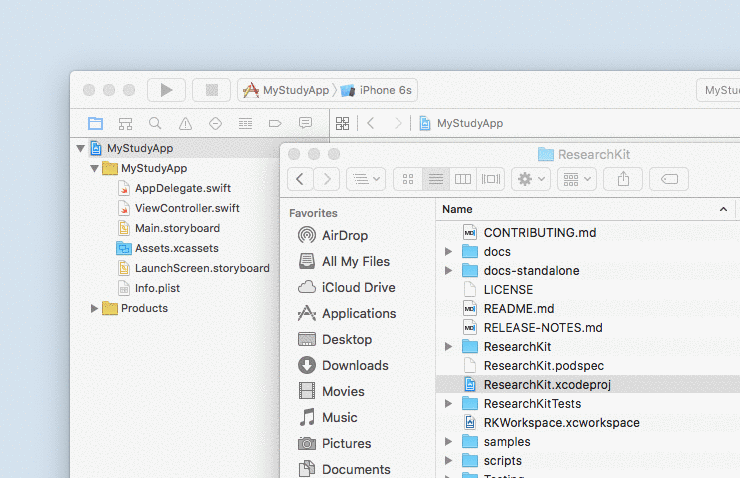
First, we need to drag-and-drop the ResearchKit project (that we previously downloaded) into our main app project. That means that we are going to have a project inside another project. Take the “ResearchKit.xcodeproj” item from the “ResearchKit” folder, and drop it into the project “Navigator” area (the column on the left). Please note that this panel in Xcode doesn’t reflect the file system hierarchy, so you can use it to organize the project files as you see fit. It doesn’t matter where exactly you drop the ResearchKit project, but it needs to be part of your root app project.
Now click on your project from the Navigator to display the project settings. At the bottom of the “General” tab, you will find a “Embedded Binaries” section. Click on the “+” button, and select “ResearchKit.framework”.
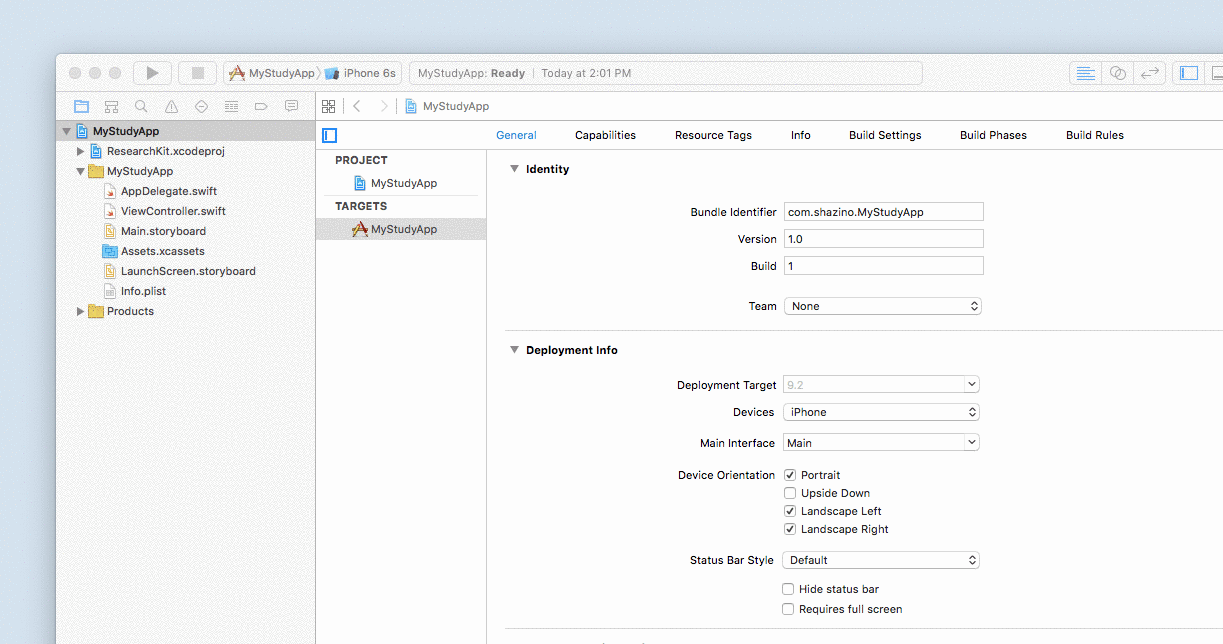
We can notice that this action will automatically add ResearchKit to the “Linked Frameworks and Libraries” section below, as well as the “Target Dependencies” in your project “Build Phases”.
That’s all we need to include ResearchKit in our project. Now every time we ask Xcode to build our app, it will first compile the ResearchKit framework (that’s why it’s called a “target dependency”), and add it to our app package. It also means that you will be able to call ResearchKit classes when you write the code for your app.
#5 — Build project
Everything is finally ready, it’s time to test that the project is working as expected.
Your app already has an “app delegate”, as part of the default Xcode template (“AppDelegate.swift” for Swift, “AppDelegate.h” and “AppDelegate.m” for Objective-C). At the top of this source file, add the “import” command:
Swift
import ResearchKit
Objective-C
#import <ResearchKit/ResearchKit.h>
You can now click the “Build and Run” button (the “▶” icon in the toolbar, also available from the keyboard with ⌘R). If everything is properly set up, Xcode will build your app, and then start it with the iPhone Simulator.
To learn more about ResearchKit, check out the Programming Guide on researchkit.org.
 Share on Facebook
 Share on Twitter