How to create surveys with ResearchKit
Surveys are probably the most used tool in clinical studies today. They can collect a wide range of information, track the disease progress or how the patient is feeling, and record basic tests results.
ResearchKit provides rich, yet easy-to-use, surveys for medical study apps. It offers templates for basic questions and specialized answers, with different types of values (text, number, dates, even images), and constraints (free-form, multiple choice, range).
This article will help you create a simple ResearchKit survey, then introduce how it can be customized to fit specific needs.
Organizing questions
Creating a ResearchKit survey is really straightforward, because the whole interface is already managed by the framework. What you actually need to do is define the questions, and the type of acceptable answers.
In ResearchKit parlance, a survey is a “task” (ORKTask, documentation), composed by a series of “steps” (ORKStep, documentation). Sometimes a step is just one question, and sometimes it’s a group of multiple questions (called a “form”). You can also include purely informative steps, for instance to provide a set of instructions, or to conclude the survey.
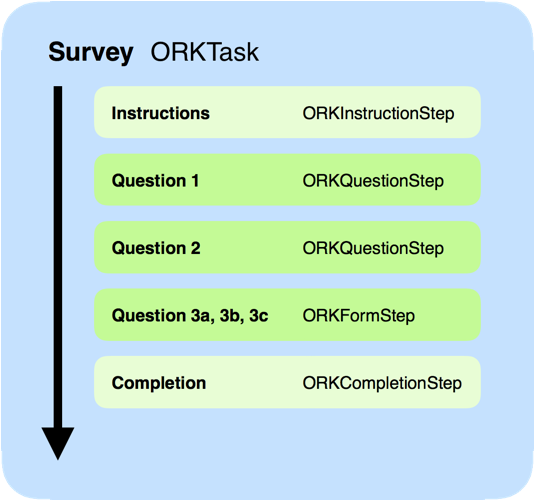
Example of survey structure, as a task containing 5 steps.
So, creating a survey essentially means defining a “task” with a series of “steps”, then passing it to ResearchKit, which will handle the presentation and navigation.
Basic one-question survey
Let’s start with a simple “yes”/“no” question.
Our step is a ORKQuestionStep (documentation). It has an identifier, which is required to be unique for our survey (in order to fetch that question later on, for instance to check the answer). It has a title, which is essentially the text of the question itself.
Importantly, the question step needs an “answer format” (ORKAnswerFormat, documentation). This defines the type of answer it expects. We will talk about all the possible formats offered by ResearchKit later in this article, but in this case we want a “yes” or a “no”, represented by ORKBooleanAnswerFormat.
  1
2
3

  let step = ORKQuestionStep(identifier: "yes-no-step")
step.title = NSLocalizedString("Do you feel good?", comment: "")
step.answerFormat = ORKBooleanAnswerFormat()
For now, this question is the only step in our task, but we will use an “ordered task” (ORKOrderedTask, documentation) to prepare for future questions. The task itself also requires an identifier.
let task = ORKOrderedTask(identifier: "yes-no-task", steps:[step])
We are now ready to present this survey. The task controller (ORKTaskViewController, documentation) can be instantiated with our task, and directly presented to the user.
  1
2

  let viewController = ORKTaskViewController(task: task, taskRunUUID: nil)
presentViewController(viewController, animated:true, completion:nil)
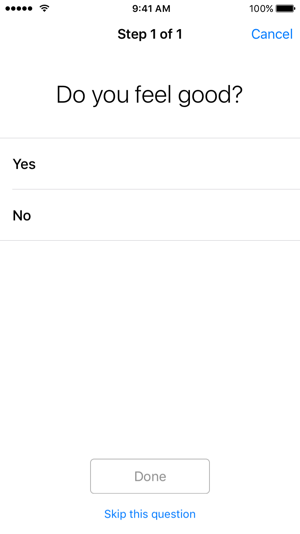
And this is what it looks like:
Instructions and completion
It’s usually a good idea to start the survey with some instructions, and explain to the participant the purpose of this task.
The ORKInstructionStep (documentation) is designed for this role. It can display a title, a text, a detail text, and an image.
  1
2
3

  let introStep = ORKInstructionStep(identifier: ORKInstruction0StepIdentifier)
introStep.title = NSLocalizedString("Basic Survey", comment: "")
introStep.text  = NSLocalizedString("This is a basic survey.", comment: "")
We create and configure this introduction, just like the main question step. Notice that ResearchKit provides a dedicated instruction step identifier constant, ORKInstruction0StepIdentifier, that we can reuse for consistency. Now we can update our existing task definition to include both steps:
let task = ORKOrderedTask(identifier: "yes-no-task", steps:[introStep, step])
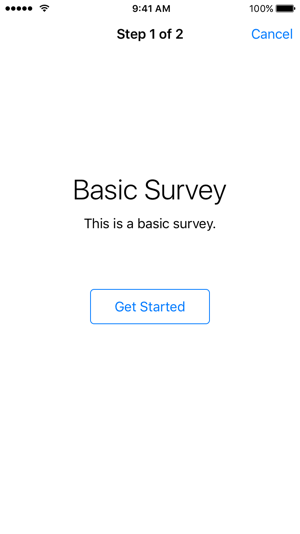
You can actually configure multiple instruction steps, and you don’t have to add them at the beginning of your survey.
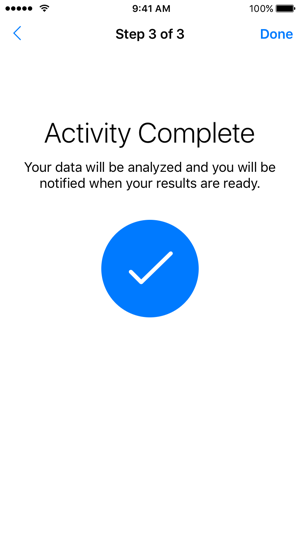
Now that we have an introduction, we should probably add a conclusion. We can create a ORKCompletionStep (documentation) step, and configure it just like for instructions. Alternatively, ResearchKit offers a helper method to generate a generic completion step, ready to use.
  1
2
3
4
5

  let completionStep = ORKOrderedTask.makeCompletionStep()
// ...
let task = ORKOrderedTask(
  identifier: "yes-no-task",
  steps: [introStep, step, completionStep])
Questions and answers formats
Now that we’ve configured a single question task, we can just duplicate this process to create more complex surveys, combining different types of questions and answers.
Here’s a list of all the answer formats provided by ResearchKit, and the type of result that they produce:
| Type of Question | Answer Format | Question Result |
|---|---|---|
| Boolean |
ORKBooleanAnswerFormat (doc) |
ORKBooleanQuestionResult (doc) |
| Confirm text |
ORKConfirmTextAnswerFormat (doc) |
ORKBooleanQuestionResult (doc) |
| Continuous scale |
ORKContinuousScaleAnswerFormat (doc) |
ORKScaleQuestionResult (doc) |
| Date |
ORKDateAnswerFormat (doc) |
ORKDateQuestionResult (doc) |
ORKEmailAnswerFormat (doc) |
ORKTextQuestionResult (doc) |
|
| HealthKit characteristic type |
ORKHealthKitCharacteristicTypeAnswerFormat (doc) |
(depends on the type) |
| HealthKit quantity type |
ORKHealthKitQuantityTypeAnswerFormat (doc) |
(depends on the type) |
| Image choice |
ORKImageChoiceAnswerFormat (doc) |
ORKChoiceQuestionResult (doc) |
| Location |
ORKLocationAnswerFormat (doc) |
ORKLocationQuestionResult (doc) |
| Numeric |
ORKNumericAnswerFormat (doc) |
ORKNumericQuestionResult (doc) |
| Scale |
ORKScaleAnswerFormat (doc) |
ORKScaleQuestionResult (doc) |
| Text |
ORKTextAnswerFormat (doc) |
ORKTextQuestionResult (doc) |
| Text choice |
ORKTextChoiceAnswerFormat (doc) |
ORKChoiceQuestionResult (doc) |
| Text scale |
ORKTextScaleAnswerFormat (doc) |
ORKChoiceQuestionResult (doc) |
| Time interval |
ORKTimeIntervalAnswerFormat (doc) |
ORKTimeIntervalQuestionResult (doc) |
| Time of day |
ORKTimeOfDayAnswerFormat (doc) |
ORKTimeOfDayQuestionResult (doc) |
| Value picker |
ORKValuePickerAnswerFormat (doc) |
ORKChoiceQuestionResult (doc) |
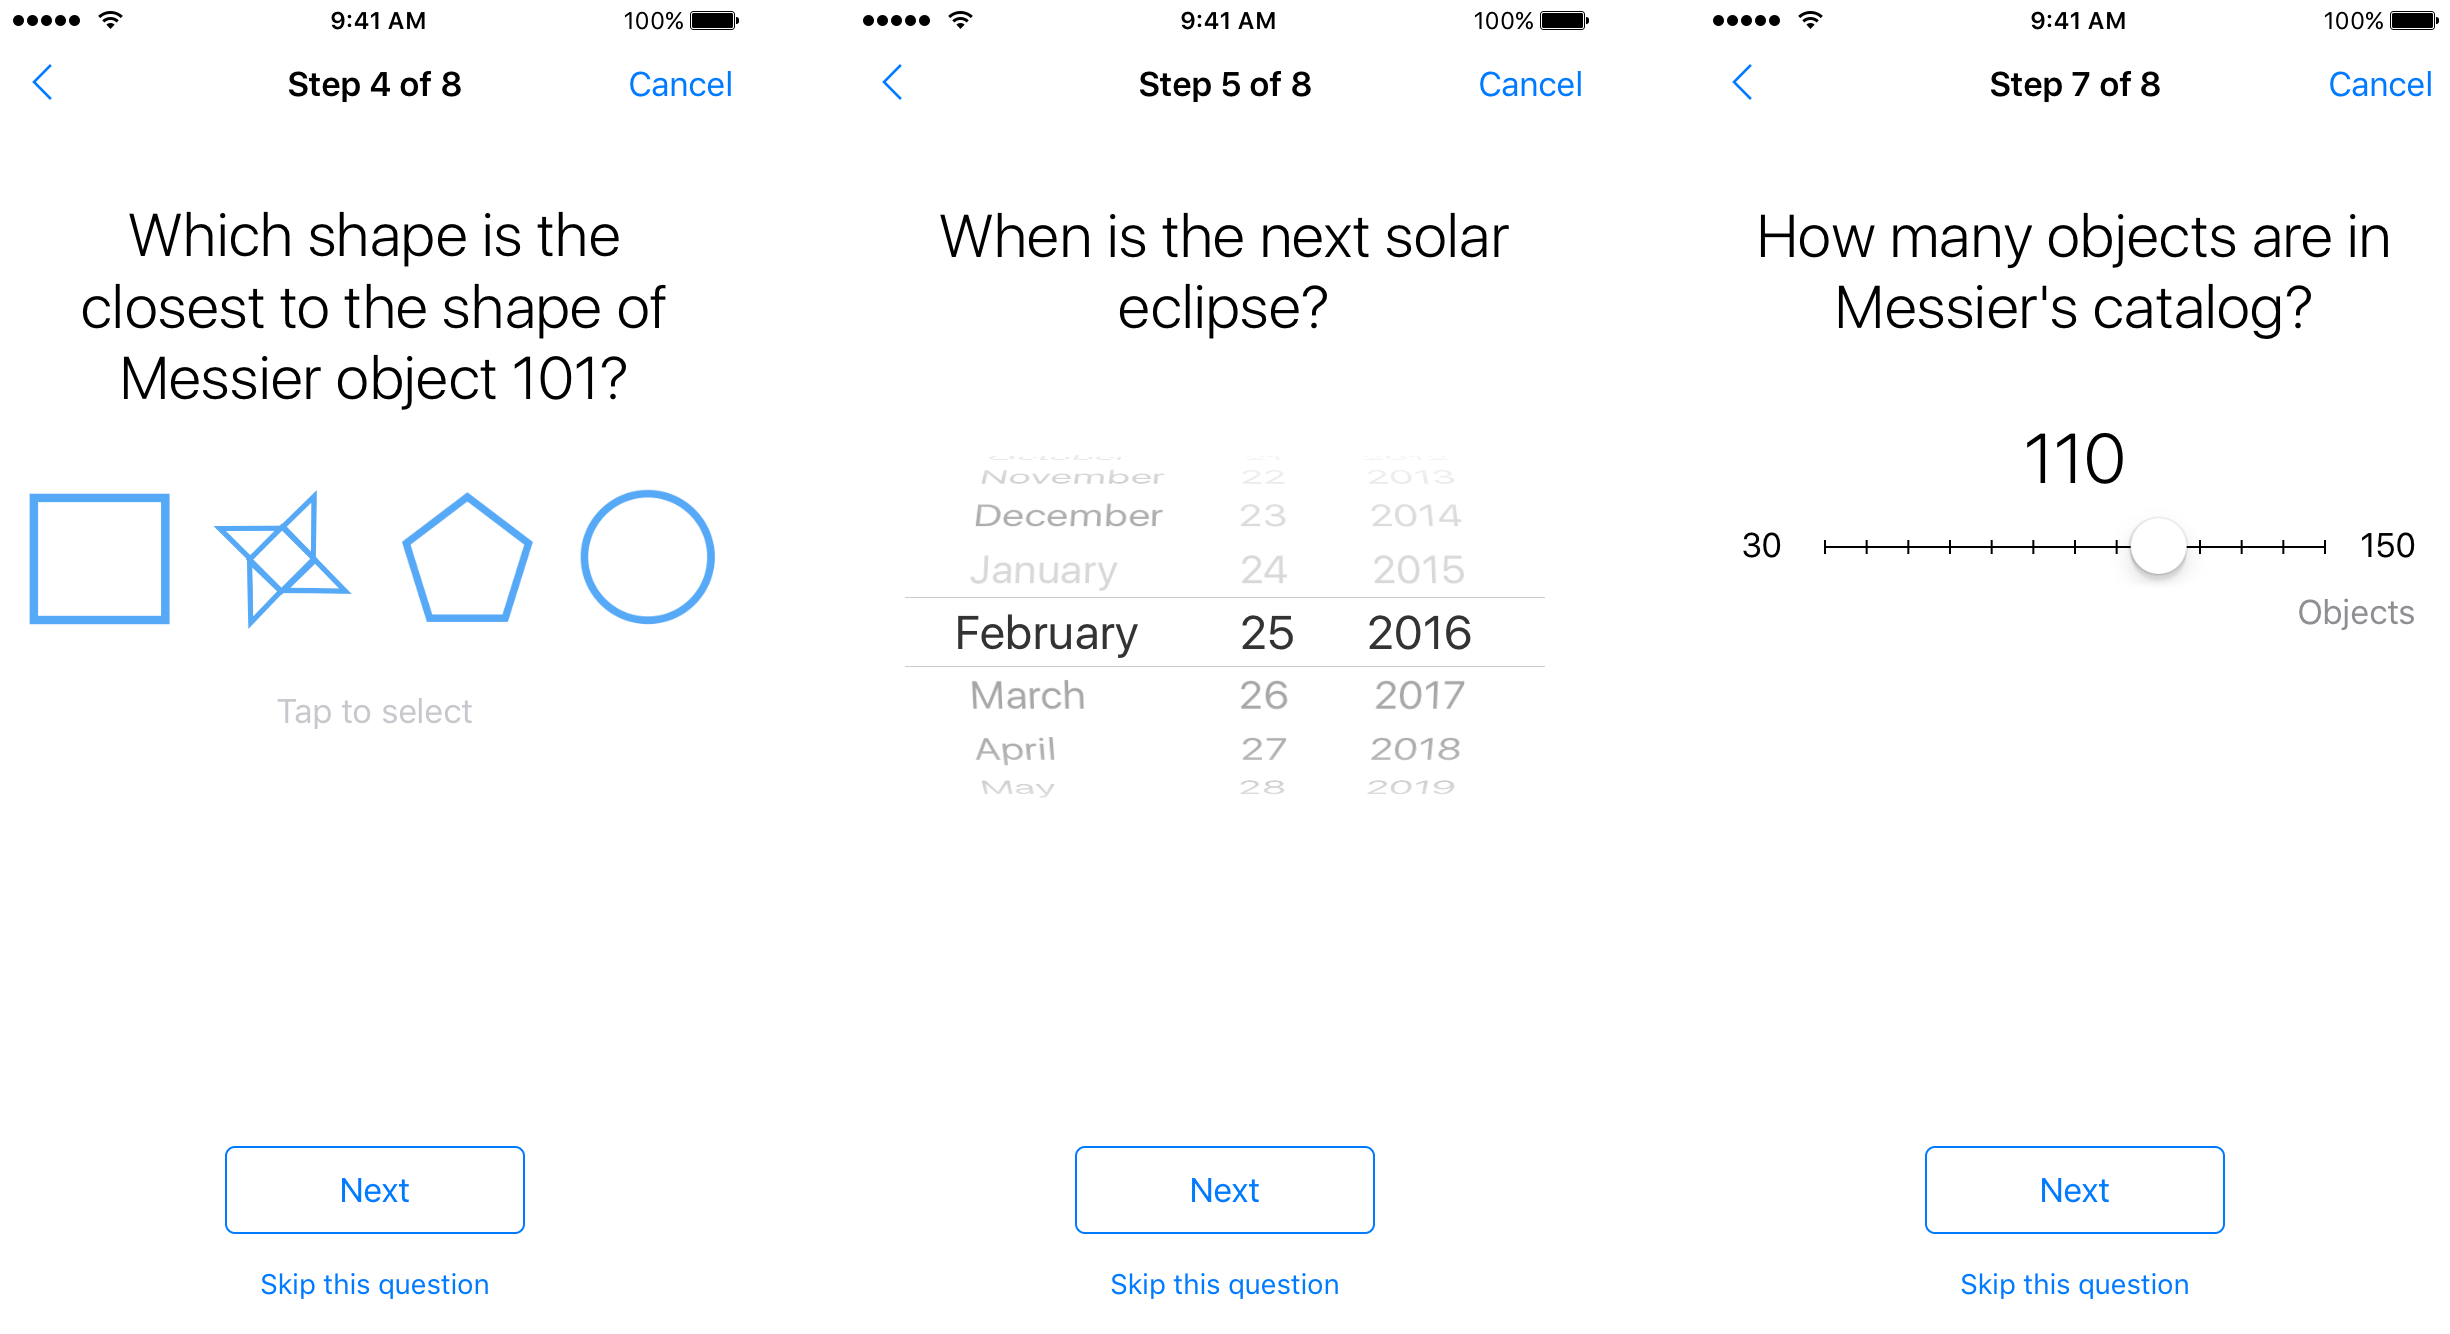
Examples of answer formats: image choice, date, scale
You can also combine multiple questions in a single step with ORKFormStep (documentation), by setting an array of ORKFormItem (documentation) where each item represents a question.
See also: ResearchKit Programming Guide — Surveys
Collecting results
If you’ve tested the survey that we’ve been building so far, you’ve probably noticed that it’s currently impossible to dismiss it. So finally, we need to handle the task completion: analyse the results, and dismiss the controller.
When the task controller considers itself to be “finished”, regardless of the circumstances, it informs its delegate. Let’s update the current controller declaration to conform to the task controller delegate protocol (ORKTaskViewControllerDelegate, documentation):
class ActivitiesViewController: UIViewController, ORKTaskViewControllerDelegate {
And let’s assign our controller as the delegate before presenting the task view controller:
  1
2
3

  let viewController = ORKTaskViewController(task: task, taskRunUUID: nil)
viewController.delegate = self
presentViewController(viewController, animated:true, completion:nil)
This protocol defines one required method, and for now we’ll only use it to dismiss the task controller:
  1
2
3
4
5
6

  func taskViewController(
  taskViewController: ORKTaskViewController,
  didFinishWithReason reason: ORKTaskViewControllerFinishReason,
  error: NSError?) {
    dismissViewControllerAnimated(true, completion: nil)
}
As you can see, this method also gives us the reason why the controller is considered “finished”, with four possible values (ORKTaskViewControllerFinishReason):
.Completed |
The task was actually completed. |
.Discarded |
The task was canceled, and the participant decided to discard the results. |
.Saved |
The task was canceled, and the participant decided to save the results. |
.Failed |
The task failed, with a given error. |
The delegate should treat the results differently, based on this finish reason, but the task controller should then be dismissed in all cases.
The task results will contain an item for every step, including the instructions and completion steps. A result item provides at least the associated step identifier, as well as a start and end dates. Each answer format generates a specific result type, so you need to be careful to cast the result with the expected class.
The following code snippets illustrate two approaches to extract information from our task results. First we can fetch the result for our main question, based on its identifier:
  1
2
3
4
5
6
7

  if let stepResult = taskViewController.result.stepResultForStepIdentifier("yes-no-step"),
  let stepResults = stepResult.results,
  let stepFirstResult = stepResults.first,
  let booleanResult = stepFirstResult as? ORKBooleanQuestionResult,
  let booleanAnswer = booleanResult.booleanAnswer {
      print("Result for question: \(booleanAnswer.boolValue)")
}
We can also iterate over all the available step results, for instance to extract the duration it took for the participant to perform them:
  1
2
3
4
5
6
7
8
9
10
11
12
13
14
15

  let durationFormatter = NSNumberFormatter()
durationFormatter.maximumFractionDigits = 2

if let results = taskViewController.result.results {
  for result in results {
    guard let startDate = result.startDate,
      let endDate = result.endDate
      else { continue }

    let duration = endDate.timeIntervalSinceDate(startDate)
    let formattedDuration = durationFormatter.stringFromNumber(duration)

    print("Duration for step “\(result.identifier)”: \(formattedDuration!) s")
  }
}
Sample code: the source code for this dashboard view controller is available on GitHub.
So we’ve learned how to customize a survey, and how to analyse its results.
ResearchKit offers a wide range of classes, with a lot of parameters, to cover as many types of surveys as possible. And if you need something even more specialized, don’t forget that these objects can be subclassed to fit all your needs. Surveys don’t have to be linear, either (check out ORKNavigableOrderedTask). So they’re just as simple, or as complex, as you need them to be.


 Share on Facebook
 Share on Twitter